Refreshing Your Test Database
Whenever you are preparing to receive the latest build of the KommerceServer software, it’s important to refresh your test database so it is representative of the production database. Since most of the content in a KommerceServer website is stored in the database, you can ensure all menu changes, new pages, and other updated content will now show on the test website by refreshing the test database.
Backing Up Your Live Production Database
Follow the procedure below to back up your live production database prior to receiving the next KommerceServer build.
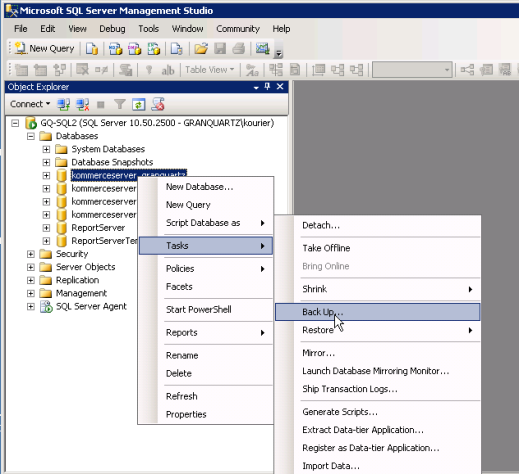
- Right-click on the production database and choose Tasks>Back Up…. The Back Up Database window appears.
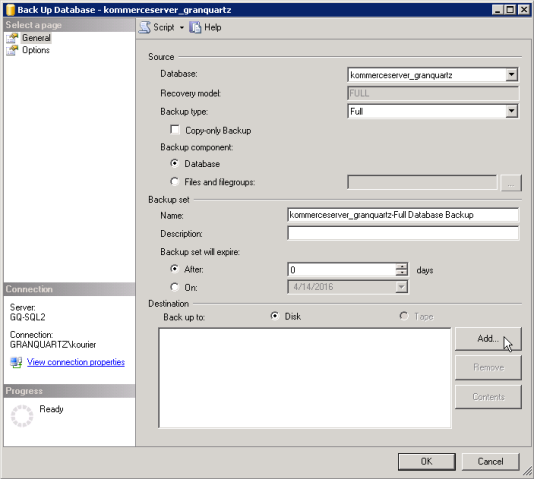
- The destination for the backup should be set to Disk. Click the Add button to select the disk location to which you want to back up the database. The Select Backup Destination window appears.

- Click the ellipses button to select the path and file name for the backup. The Locate Database Files window appears.
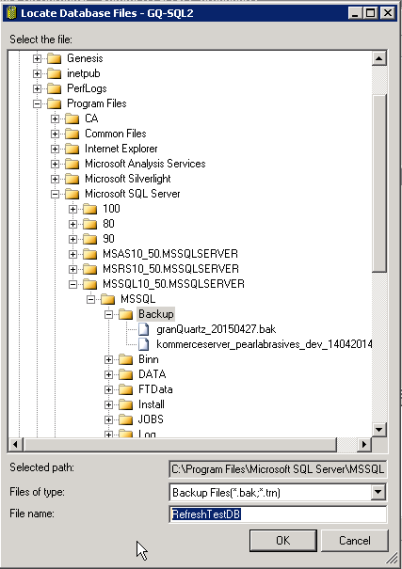
- Choose a recognizable name and click OK. The Select Backup Destination window appears.
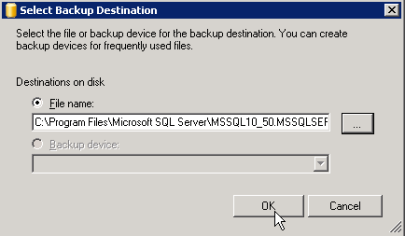
- Click OK when path and file name are set. The Back Up Database window appears.
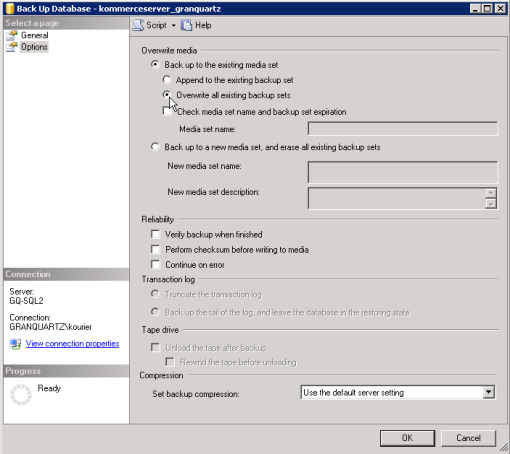
- Select the Options page in the left pane and select the Overwrite all existing backup sets radio button.
- Click OK to start the backup. You will receive a confirmation message when the backup is successfully completed.

- Click OK to clear the message.
Restoring Your Test Database
After a backup has been made from your live database, a restore can be made to the test database. Typically, the version of KommerceServer is the same on the live website and the test website. If you have already downloaded and deployed an upgraded version of KommerceServer to the test website before restoring the database, you will need to open the website and go through the upgrade wizard.
Caution: If the test website is running an earlier version of the KommerceServer software, DO NOT restore the database or it will be rendered incompatible.
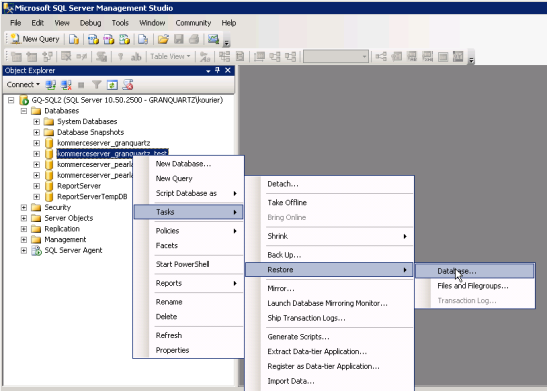
- Right-click on the test database and choose Tasks>Restore>Database… The Restore Database window appears.
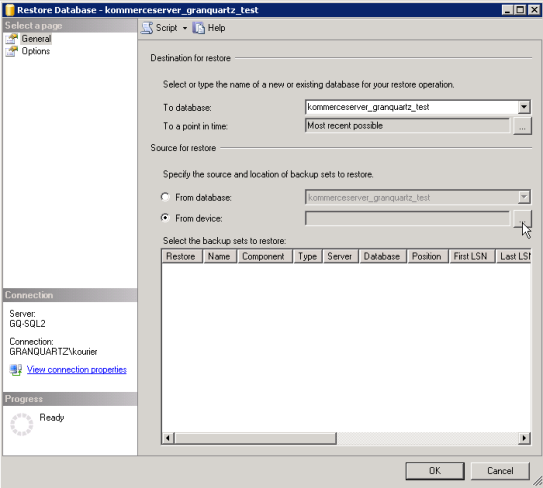
- Select the From Device radio button for the source of the restore and then click the ellipses button to choose the file location of the backup to restore. The Specify Backup window appears.
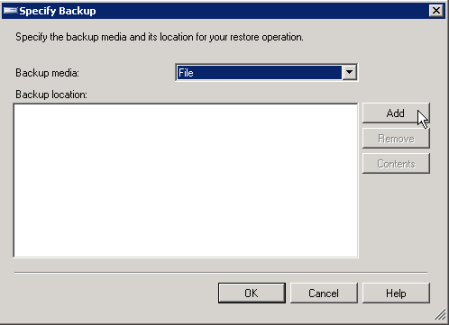
- Click the Add button. The Locate Database files window appears.
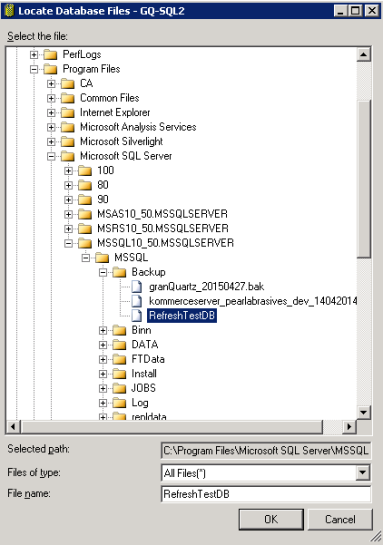
- The name of the backup file should display automatically if the .BAK extension was used in the name. If it does not, select the All Files(*) option in the Files of type drop-down menu. Once you have selected the backup file, click OK. The Restore Database window appears.
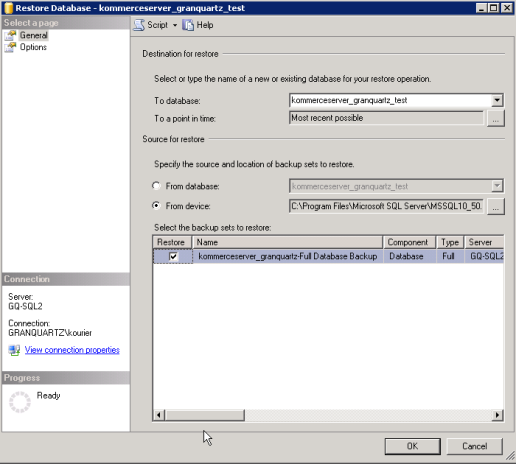
- Check the Restore checkbox to select the source file location, and then click OK.
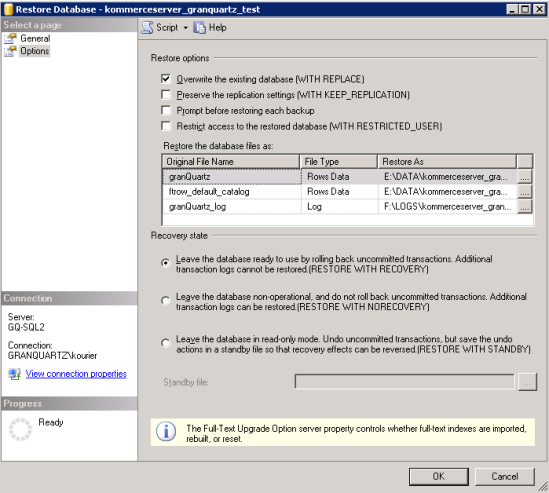
- Choose the Options page and select the Overwrite the existing database checkbox.
- Click OK.
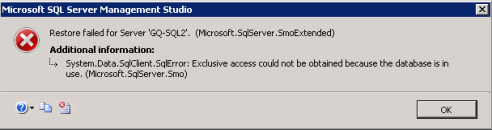
Tip: If there are users accessing the test database, they will need to disconnect. It may be necessary to recycle the application pool for the test website to do this.
The following window appears if users are accessing the test database when you run the restore process.
- Open the Microsoft SQL Server Management Studio client tool.
- Navigate to the database you just restored in the Object Explorer pane.
- Right-click on the database and select the New Query option.
- Type the following command in the SQLQuery pane:
ALTER USER ks WITH LOGIN = ks
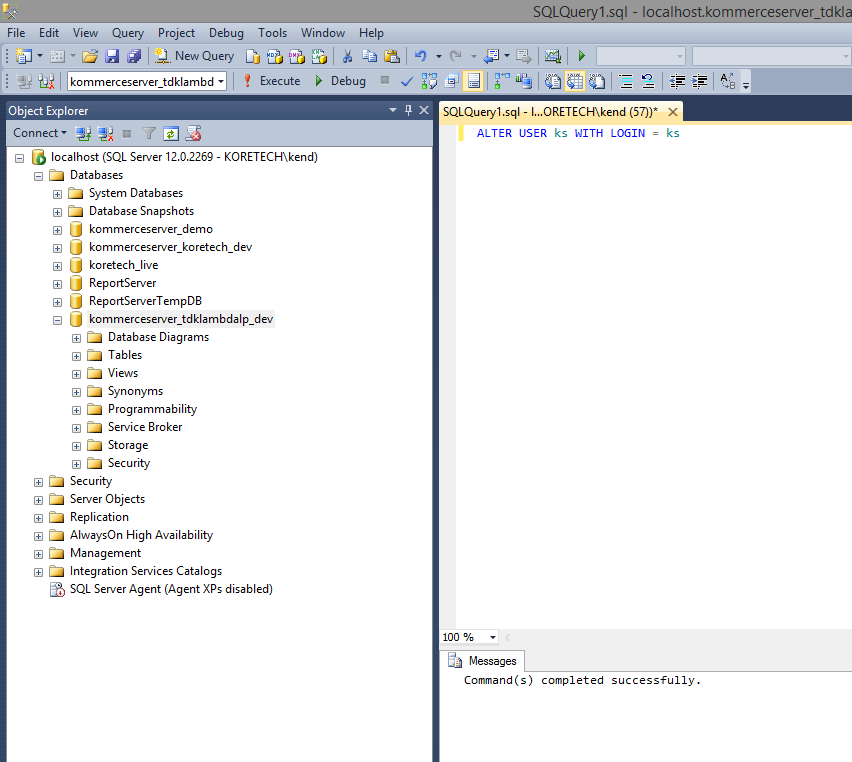
- Click the Execute button in the toolbar to execute the command.